Creating Workspaces
In this tutorial you will learn about the various ways to create and manage your data in Matatika workspaces.
Sign Up or run the Matatika Community Edition locally
The simplest way to get started is to head to the Matatika website and sign up. However, you can run the Matatika Platform locally with our Community Edition. For more information, see our Getting Started page.
Create an empty Workspace
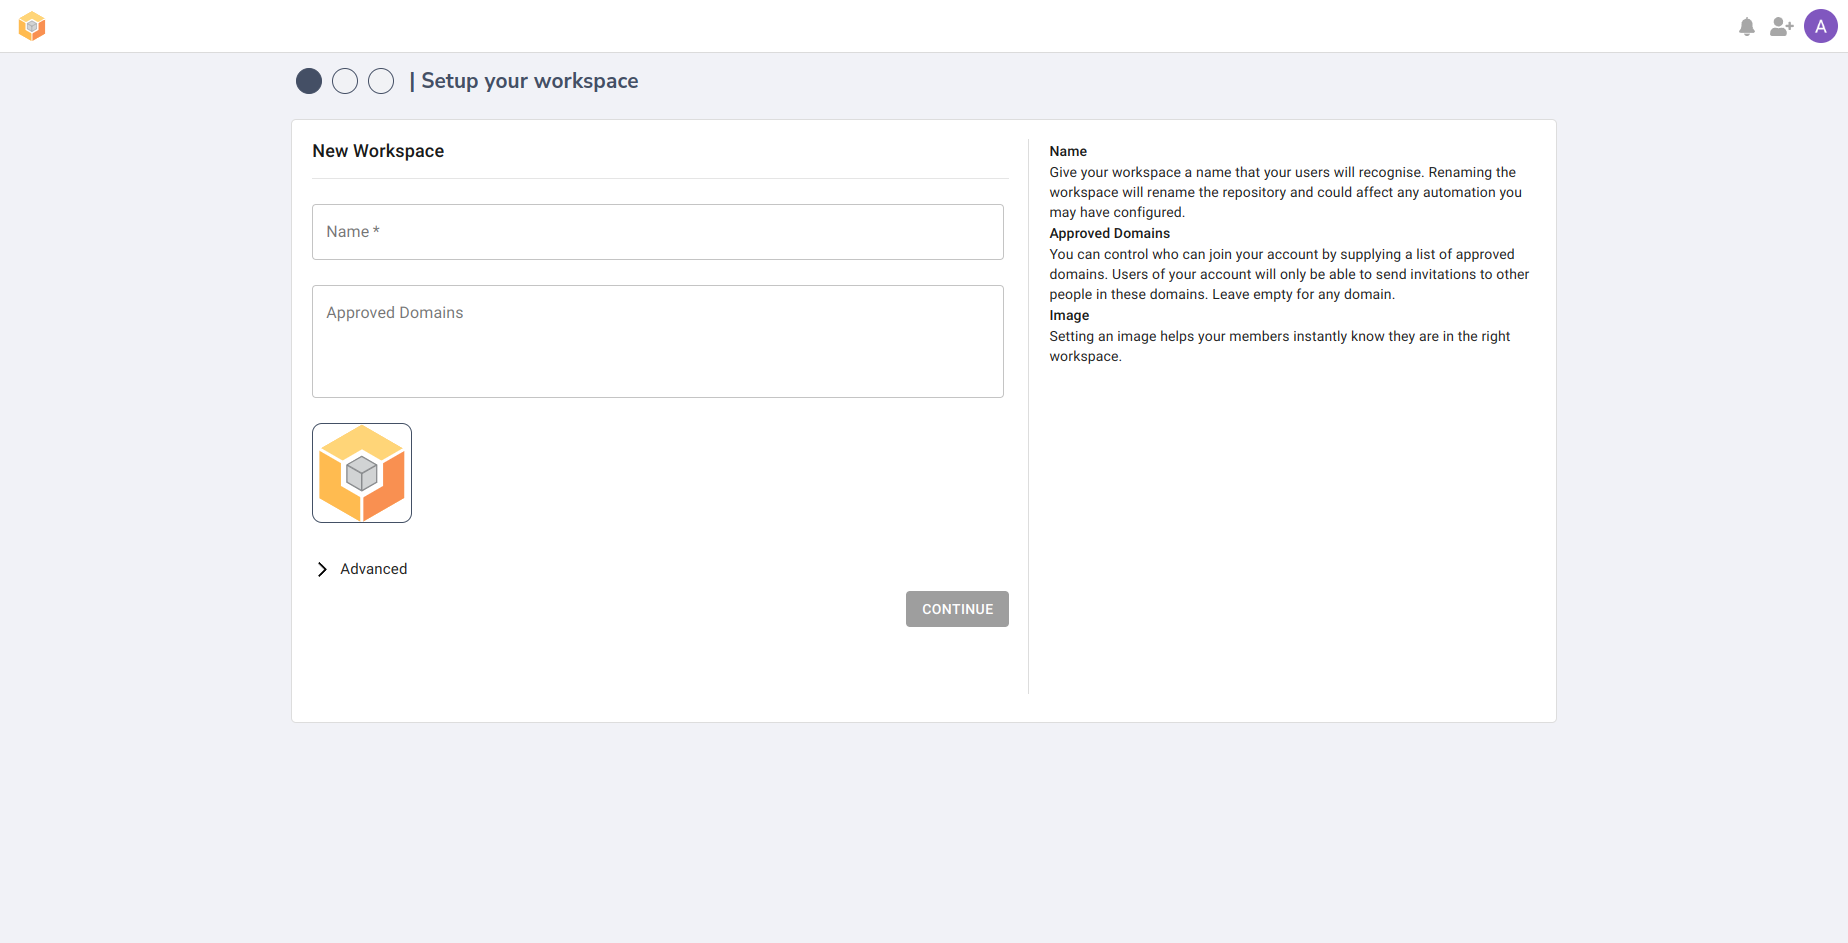
The first time you sign-in to the Matatika app, you will be prompted to create a new workspace:
- fill out the ‘Name’ field (and optionally ‘Approved Domains’)
- click ‘Continue’.
Once completed, you will can manage your workspace through the Matatika Lab, Matatika API or locally with VS Code.
Create a Workspace from an existing repository
You may have noticed the ‘Advanced’ section on the new workspace screen. You can create a new workspace from an existing GitHub repository by supplying the ‘URL’ and optionally a ‘branch’. We will create your workspace using this repository. We support any repository created by Matatika and any existing meltano projects.
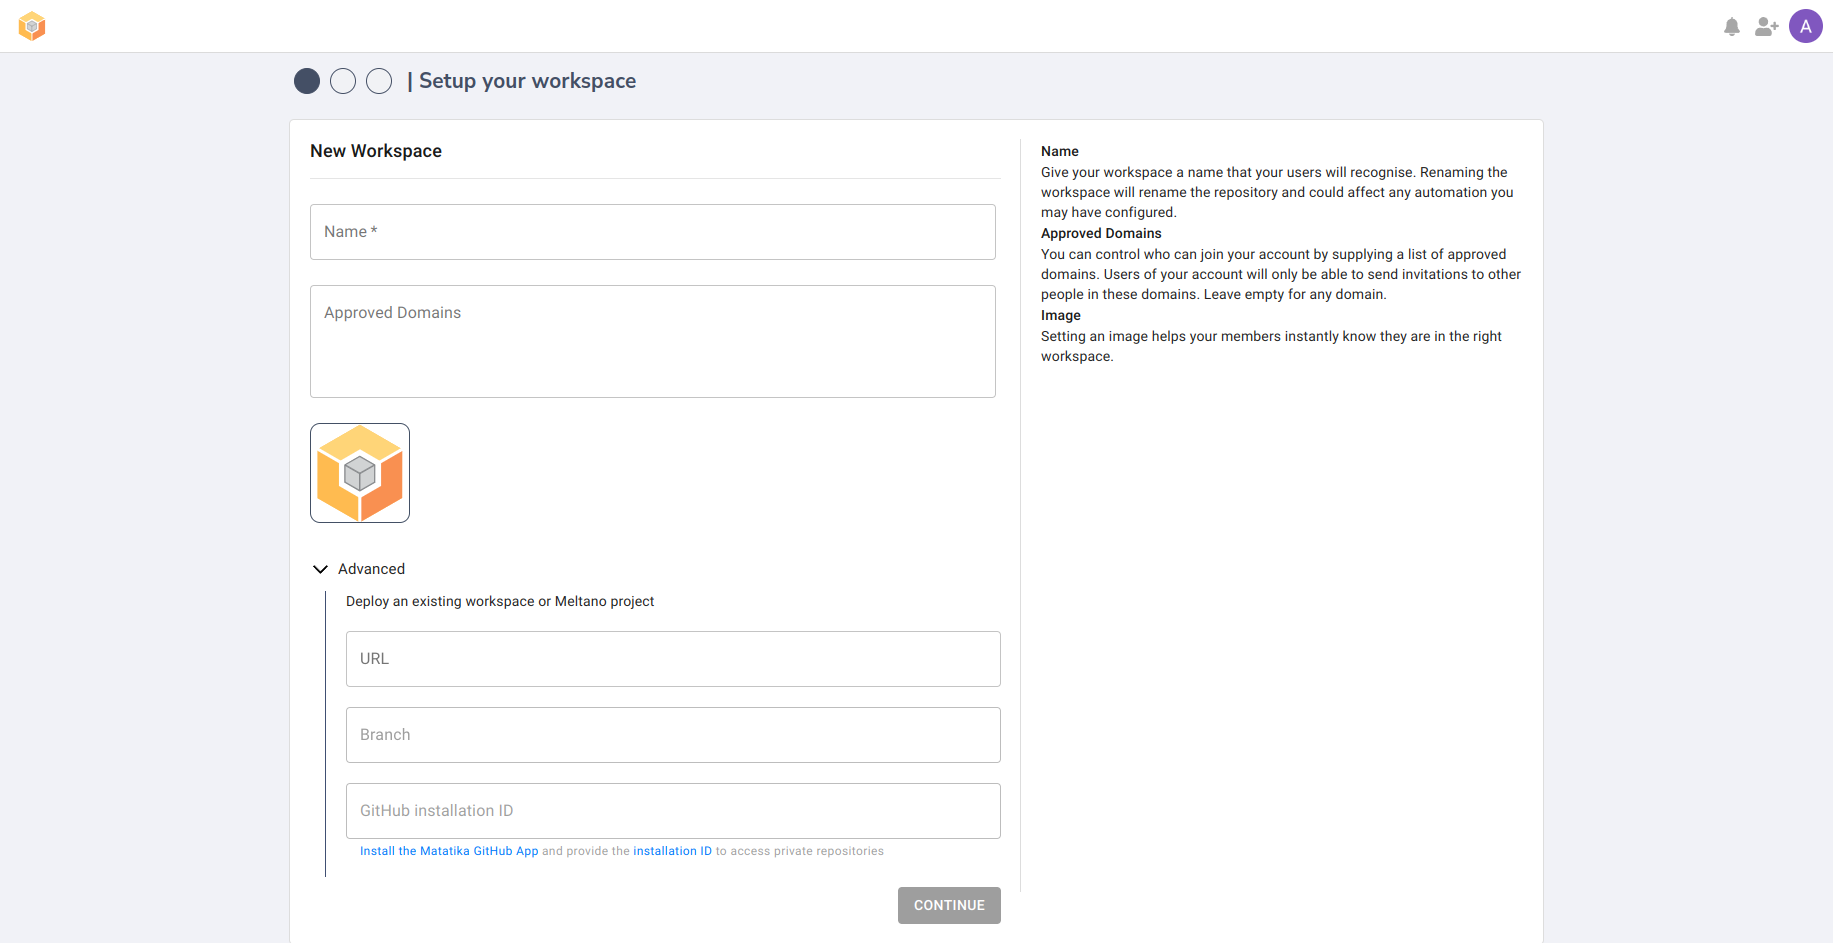
Once created, the Matatika Lab is able to manage your new workspace independently of your source repository.
What’s next? Learn how to manage your changes locally with the Matatika Community Edition and git: